Showing posts with label saving money. Show all posts

Thursday, May 16, 2013

Spending Ban.....take two. :S

*sigh*  I have yet ANOTHER confession to make.  Remember my spending ban that I imposed on myself back in February?  (deep breath, Devan. Coming clean makes it easier to recommit and do things right...)

I broke it. 

Within like 2 weeks.  I bought something for my house and then never looked back.  Ugh.  I'm a little bit disgusted with myself....but mostly disgusted with the amount of money I could have been saving.  Stupid.

But!  No time to beat myself up.  Time to hoist myself up by my bootstraps and restart my spending ban.  Here's my vow:

I, Devan, am on a complete, total and all-encompassing SPENDING (not just shopping) ban, beginning today, May 16th, 2013.  I will continue to be on a spending ban for three months, until August 16th, 2013.  I will be allowed to buy these things...and ONLY these things:

1.  Gas for my vehicle
2.  Groceries/food for my family.
3.  Items needed for my DIY Divas in Training projects.
4.  Summer clothes for Avery (needed.  not a joke.)
5.  Summer clothes for myself (badly needed.  still not a joke.)
6.  We, as a family, can go out to eat once every 2 weeks.
7.  I will allow myself a fast food Dr. Pepper one time a week.
8.  Things for Avery's birthday party (without going overboard, like I always tend to do).

That's it.  The end, that's all she wrote, nothing else (are you listening Devan??).

Not only am I on a spending ban, I am implementing a few other plans for my "Penny Pinching" lifestyle.

1.  I'm going to start "debt snowballing."  Check out some Dave Ramsey stuff.
2.  I'm going to put aside a set amount out of every paycheck for savings.
3.  I'm going to put aside a set amount out of every paycheck for my remodeled kitchen to be able to pay it in cash.
4.  I'm going to make a little extra money by:
-having another yard sale
-selling more paintings
-selling some of my bigger items on eBay

There's my plan.  Here's where you come in:  if you see me in town and I'm not buying one of these approved items, you have my permission to question me.  Seriously.  Ask me if I'm buying things off my "spending ban list" and guilt me into putting the stuff back.  If you see me at McDonald's, ask how many Dr. Peppers I've had that week.  If I tell you more than one, feel free to smack it out of my hand (or take it and put it in the trash...less mopping that way).  I'm terrible at self-discipline.  Breaking my spending ban is a testament to that.  Help me!

Wednesday, February 27, 2013

Weakness Points

Recently, I made the commitment to pinch my pennies, go on a budget and start a shopping ban once again.  I thought the first step I should take is to identify all of those places that I fall prey to spending more money (I'm nervous this is going to be a long list....) so I know which places (and areas) I need to steer clear of when out in town.

1.  Wal-Mart
via
I touched on this yesterday, but I'm terrible about making a grocery run and buying a bunch of crap I don't need.  I'm the poster child for effective advertising.  If it promises to make my life easier, more organized, simpler or just looks pretty in the package, I'm probably going to be tempted to buy it.  Thanks to some really great readers, I've gotten some great suggestions on where to shop for groceries once we move back to Etown.  Now, I need a lesson in couponing.  I don't want to be an extreme couponer, by any means, but I always seem to find the coupons that are "Buy 6, get 1 free."  Well, I don't need 6.  I'll barely use the one that I have to buy.  I need to know where to find good, worthwhile coupons that are going to save me money on the things I need without making me buy 80 of them to get a discount. 

2.  Target


via
Oh Target.  How I could talk for hours about your Clearance section and clean stores and Bullseye logo that suck me in.  Your accessories, your clothing, your shoes, your home section.  I love it all.  And that's why I won't be seeing you for 90 days.  At all.  I just can't.  I don't have that much willpower.  But please know that I will miss you very much....even though my bank account won't.

3.  Organizational aisles

I'm an organized nerd.  I love planners, binders, bins, shelves, containers, anything that makes my life even halfway organized. I will buy planners just because I like the way they're laid out....even though I already have a planner for 2013.  I'll buy stackable containers to store office supplies...even though I already have an organizational system in place in my home office.  Therefore, I must stay away from Office Depot, Staples, Michaels and all organizational and home supply aisles in any store I go in.

4.  Pier One, Kirklands, TJ Maxx, etc.

We're moving.  We're getting a new home.  A blank canvas.  That's just begging to be decorated exactly how I want it to be.  That I'm dying to make look exactly like all the pins I've been faithfully pinning on Pinterest.  But I can't.  That would be EXPENSIVE.  Instead, I'm not going to unpack all of the old stuff that I didn't like about our current house.  I'm going to work on my house a tiny little bit at a time.  It may take 5  years, but it would finally be how I wanted it.  I'm horrible about buying little knickknacky clearance things if I think it looks cute.  As a result, my house looks.....jumbled.  Not pulled together.  Not how I want it.  Stay away from all home goods stores, Devan.

5.  Avery clothing

Ugh.  Little girl's clothing.  I buy it like crazy...even when my child doesn't need it.  I buy the cutest dress, the cutest shoes, the cutest shirt.  As a result, she has a pair of shoes that only match two shirts in her entire wardrobe, shirts that don't match any pants and dresses for the wrong season.  I'm going to plan ahead when it comes to shopping for Avery.  Before buying that adorable shirt, make sure it's practical and that she can wear it more than just once.  I'm going to allow myself to buy Avery clothes during my shopping ban, but only on a limited basis and only if she truly needs it.

6.  Clearance sections

Do I need to say more?  Totally off-limits.


That's it.  It's easier for me to spend less when I can identify my weaknesses and know exactly what I need to stay away from.

What's your shopping weakness??

Thursday, February 14, 2013

It All Comes Out in the Wash (Detergent Update!)

The blog post I get the most questions about in real life, hands down, is the question about my homemade laundry detergent.  Do you remember that?  Let me refresh your memory (a.k.a. click here. It'll take you to the original post).  I thought I would talk a little bit about it in case you were curious!

I made my laundry detergent back in JUNE.  I just ran out last month.  That's SIX MONTHS of not buying laundry detergent.  Absolutely reedonkulous.  It was time to make some more, so I thought I would do a little tweaking to the original recipe. 

I'll start by saying that Marty didn't love the homemade detergent.  Almost from the moment I made it, he turned his nose up.  I guess because it's not a trusted brand or well-renowned for it's cleaning ability...I don't know.  Whatever the reason, he wasn't really wanting to give the 1950s detergent a chance at all ( but that didn't stop me from using it *cheesy grin*).  I figured out later that Marty likes really fresh clothes that have a distinct "just washed" smell.  That's probably one of the few negatives about this detergent.  It doesn't have much of a smell--which doesn't bother me.  I don't have to walk around every day smelling like a fabric softener sheet, but apparently my husband does, so I wanted to fix that with this round of detergent.

Recap:  here's the "recipe" to make your own homemade laundry detergent:

1 box (76 oz) 20 Mule Team Borax
1 box (55 oz) Arm and Hammer Super Washing Soda
3 bars of soap**

**In my original round of making detergent, I used plain, ole Ivory soap.  This time, I went for the actual laundry soap...Fels Naptha (you can also pick up Zote--another laundry soap brand).  Heads up, if you go this route?  This stuff is strooooong scented.  Like make your house smell like this soap for THREE DAYS STRAIGHT strong.  


So, let's make the detergent.  Dump the Borax and Washing Soda into your chosen container.  I've been using a cute red beverage tub I found on clearance at Target.  
Then, grate all three bars of soap into the mix with a cheese grater.  Looks just like grated cheese.  A little weird.


Now, one more change from the original batch I made.  To make the detergent and the laundry smell cleaner, I added a bottle of Purex Crystals.  


I picked the Fresh Spring Waters scent, just because I didn't think the hubs would appreciate the Lavender smelling clothing.   

So far, I like this version detergent better.  It smells clean and I think the Purex Crystals add to the cleaning power.  And....hubs hasn't complained.  Score. 

Last time, I compared my savings in making my own detergent vs buying a bottle of Tide or other brand name.  Since I added the Purex Crystals and spent a little more on the Fels Naptha, I would say I spent around $13 on this batch.  Since there are more ingredients, there's more detergent to go around (175. oz worth)  Here's the math: 
Cost of detergent/amount of detergent (tbsp)=Cost per load of laundry

There are 175.5 oz in this batch.  1 oz=2 tbsp.  So, 351 tbsp. of laundry.

$13/351 tbsp= 4 cents a load
I use 2 tbsp in each load of laundry, so it costs me 8 cents a load.

Yep.  Totally still worth it. 

What kind of products do you make yourself and save money?  Share!! 


Thursday, September 13, 2012

Thirty for Thirty {days 6-10}

I know I'm a little behind, seeing that today has been the 13th day of my "30 for 30" challenge, but here's an update on days 6 through 10. 

Yikes.  Looks like I need to retire that white shirt for this next week.  It got A LOT of wear this week!!  It also looks like I need to start taking pictures with my real camera...iPhone pictures just aren't cutting the mustard anymore. 
Day 10 has probably been my favorite outfit so far.  I love yellow and black together.  On the flip side, day 9 was probably my least favorite.  That skirt just accentuated the pooch I'm trying so hard to get rid of and made me feel self-conscious the whole day.  Looks like it's time to retire it and put it with the other clothes I want to wear when I'm skinnier. 
I've done a MUCH better job this week of accessorizing and dressing up outfits with belts and jewelry.  Skinny belts are my favorite (if you couldn't tell).  I also think I've developed an addiction to costume jewelry.  Anytime I go shopping, it's the first thing I check (since I'm not allowed to buy new clothes, it's the next best thing!).  My favorite places to buy cheap jewelry have been Wal-Mart, Target, Claire's (when things don't look too teenage-y) and a new discovery--Body Central.  When I shopped there the other day, all their jewelry was $3.90 (yes, you read that right).  I loaded up on bracelets and necklaces.  It's amazing to me how quickly a piece of jewelry can change an outfit completely. 
This week has been a lot easier than the first....see you again on days 11-15!

Friday, September 7, 2012

Thirty for thirty {days 1-5}

It's my first "30 for 30" update post and let me tell you people.....this is hard.  It may not be hard for a girl with major fashion sense that can accessorize anything from an evening gown to a paper bag.....but I am not her.  Far from it, in fact.  I never realized how hard it would be to mix up shirts and pants without making it look like I'm wearing the same thing every single day.  Plus, it doesn't help that it's been in the mid-90s here all week and layering to change the looks of my outfits is not an option.  Hopefully, I'll get to wear some of the blazers and cardigans I picked out before the end of this month.  Otherwise, you're going to be seeing the same outfits every single week.  *sigh*  Well, here goes.  My first five days on my 30 for 30 challenge.  Take a look.  Critique.  Tell me what would look good with that green shirt so it doesn't look like I have nothing else to wear.  Really.  I need feedback.

Suggestions?  Ideas?  Accessories you wanna give away to help me jazz these outfits up? 

Saturday, September 1, 2012

Thirty for Thirty

Yesterday, I told you that I would be starting a new project today.  You might have heard of it before on Pinterest or browsing some of your favorite blogs.  I got the idea from Lauren, over at From My Grey Desk and her sister Kate, over at The Small Things Blog and The Pretty Life Anonymous (my favorite).  Starting today, I'm embarking on the "30 for 30 challenge."  Sound familiar?  No?  Let me explain. 
You can only wear 30 items for 30 days.  It sounds easy.  Read any blog of someone who's done it, they'll tell you otherwise.  Everyone has their own rules.  Here's mine:

1.  Only wear 30 items for 30 whole days.
2.  Items include: shirts, jackets, sweaters, shoes, pants, skirts, dresses.
3.  Accessories like belts, jewelry, scarves and hose aren't included.
4.  Undergarments like camis and tank tops are not included (This is necessary when you have a one year old that likes to yank your shirt down in front of a crowd of people.  Wish that was a joke.)

There's the rules.  There's the challenge.  Here's my 30:

September 1st to September 30th, this is all I get (I didn't include today's outfit because I bummed around the house all day--but I'm making up for it by wearing two outfits tomorrow).  Why, you ask?  Because I mentioned the other day that I was scared to branch out in my fashion.  I wear the same things over and over again because it's safe.  This will make me become braver with my accessories and outfit choices.  If I only get to wear 30 items for an entire month, I'm going to have to mix things up and find new ways to wear the items in my closet.  Not only that, I'll learn how to get more wear out of the things I own.  I'm really bad about only putting a shirt with a pair of pants and not adding anything else.  I wear this shirt with these jeans ONLY.  I don't know how to mix and match.  This will teach me how to wear this shirt with these jeans AND this skirt AND these dress pants.  Win-win. 
I almost forgot!  My sister, Dayna, is doing this with me.  She'll be documenting her 30 days over at the Nelson County Extension blog.  She's a Family and Consumer Sciences agent for the University of Kentucky and she'll be looking at the project from a thrifty side....save money by not buying new clothes every time you get tired of what you have.  Mix it up with other things and keep more dough in your pocket. 
It's going to be a long, but exciting 30 days.  Wanna come along for the ride?  We're more than happy to have a few fashion pioneers along with us!

Wednesday, July 18, 2012

OOTW--bills, bills, bills!

I love Wednesdays.  It's quickly becoming one of my favorite days of the week....because it's an excuse to look around my house, find what needs organizing and do it! 
This week, I'm tackling bills.  It's so easy for bills to get piled up or pushed aside and forgotten about until that dreaded "Payment Overdue" statement comes in the mail....or worse, when you notice a late fee tacked on to next month's bill.  When I was first on my own and had just a few bills to handle,  I was so overwhelmed.  How can you keep up with all of these due dates and amounts due and which bill to pay when??  And that was just the basic bills of a college student!  Then I grew up, got married, bought a house and found out what it REALLY meant to be in debt and have bills.  Marty and I have recently split accounts and bills for us each to handle.  It was a great way to keep up both accountable for where our money was going and it cut down on unnecessary "You spent HOW much??" kind of fights.   I thought I had it under control....until this month.  Marty, by the grace of God, has found a new job.  A new job that's going to bring a bigger paycheck (wahoo!).  But a bigger paycheck brings more opportunity for wasteful spending and little penny pinching.  So, to make a long story short, we're joining accounts again, under the stipulation that I am in charge of the bills.  Insert super organizational skills here!  To keep all of the bills, due dates and payments under control, I have corralled all of the monthly statements in this gorgeous binder:

Call me old-fashioned or not being earth-friendly, but I like having a paper statement in my hand every month that tells me exactly how much I owe and gives me the details of my charges.  Yes, I know I can go online and view all that information, but something about holding a physical piece of paper in my hands gives me a sense of satisfaction.  I have all of the statements separated by dividers and labels so I know where each bill is whenever I need to refer back to it. 
Now, this is my favorite part.  I made up a printable bill organizing checklist, so I can view all of our monthly expenses at once. 
I'm a visual person.  I won't believe that it's done until I see it written down and checked off.  I guess I'm a little OCD. 

Not only do I have the list of bills, but I also made a pretty list of when to pay which bills.  You see, when Marty starts this new job, our paychecks are going to be scattered throughout the entire month.  To keep me from paying too many bills out of one single paycheck, I have them scattered so we still have spending/saving money leftover.  This printable shows me EXACTLY when to pay which bill.  Super daggone helpful. 

P.S.  Both of these printables are free for you to take!  Print them off, make your own binder and revel in your organization!

Bills to Pay FREE printable! 

Thursday, July 12, 2012

Minnie Mouse Birthday Bash--Invitation Tutorial {part 1}


Avery is turning one soon and I am in full-blown party planning mode.  Thanks to Pinterest and its abundance of Minnie/Mickey themed party ideas, I have a million things I want to do.  Obviously, people have to KNOW about the party, so I'm tackling the super-adorable-but-crazy-time-consuming-and-overambitious invitations.  And if you're crazy like me and want to keep some money in your pocket by making your own invites, then this tutorial is for you. 
When I first started thinking about themes and looking at invitations, I came across these:
{via}
I died.  Can words describe how cute these are??  I immediately clicked the link, searched through her Etsy shop.....wait.....does that say $27.50 for a set of 10 invitations??  Considering my family is ginormous and we're probably going to have close to 40 invitations to send out, that means I would be paying a whopping $110 for 1st birthday invitations!  Not happening my friend.  So I tried looking at other (and less) expensive options for my sweet girl's party.  I found nothing that I liked as much as these sweet invitations.  That's when I temporarily lost my mind and decided to make these invitations by hand.  For you penny pinching birthday planners like me, here are the steps I used to make my very own Minnie Mouse invitations.  {Warning....this tutorial is about to go picture and detailed description crazy.  I like step by step pictures because I'm more of a visual person.  Oh, you too? *friends*}  Ready?  Let's go.
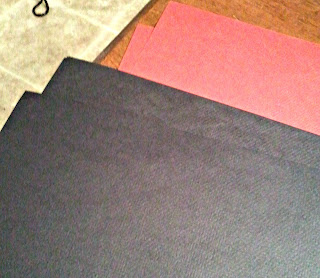
{step1}  I started by purchasing black and red poster board for Minnie's head and dress.  If you're sending out a smaller quantity of invitations, you can also purchase red and black cardstock.  I knew that I would need to be making these in bulk, so I went with the poster boards.  I did splurge a little here and buy the posters at Michael's instead of from Wal-Mart or Target.  Reason being is the color is a little richer and not so washed-out looking.

{step2} I knew that these invites would be a little funky shaped, so I went to my nearest office supply store and bought the only square envelopes I could find--CD envelopes with the window (which needs to be covered up before mailing).
{step3} Next, I laid one of the envelopes down on the black paper and traced out the shape so I knew exactly how much room I had to work with and how big my Minnie heads could be.

{step4} After having the envelope size, I found a cup that was the perfect circle shape for Minnie's head. Laying it on the black poster board, I traced around the cup in pencil.
{step5} When I found the perfect circle shape for the head, I went on the hunt for a circular item for the ears that were in proportion to the head. I used one of Avery's bottle tops, but you can use any item laying around the house that is circular shaped and is about the right size. Trace around it with pencil.
{step6} Once you have your Minnie head drawn, cut it out.
  {step 7}  Take the same cup you used for Minnie's head and draw a circle onto the red poster board.  Cut out.
{step7}  Line the red circle up with Minnie's head that you cut out of the black poster board.
 {step8}  By eyeballing the red circle or measuring it out, cut it in half. 
{step9}  Glue a line in a half circle shape along the bottom of Minnie's head (kind of making a smiley face). 
{step 10} Place one half of the red circle on the bottom half of Minnie's head where you just placed the glue.  This will create a pocket for you to put your written invitation inside!
{step11}  Every good Minnie fan knows that Minnie wears a polka dotted dress.  To create the dots, I took a circle-shaped punch (purchased at Michael's) and punched out multiple circles out of white cardstock paper.  I randomly placed the circles along the red poster board and glued them on with tacky glue.
{step12}  Here's where you can get a little creative.  Minnie Mouse would not be complete without her signature bow.  I had originally purchased thin ribbon that was red with white polka dots to match Minnie's dress.  When I made the bow and held it up to the invitation, I wasn't happy with the overall look.  For a bigger punch, I decided to make Minnie's bow out of red poster board just like the dress.  I free-handed a bow shape onto the poster and cut it out.
{step13}  After cutting the bow out, I took a fine black Sharpie marker and added little details.  After that, I took a regular hand hole puncher and cut out smaller polka dots from the white cardstock and glued those onto the bow with a glue stick.  After that was completed, I then glued the bow onto Minnie's head.  Ready for the final product?  *drumroll*
I am completely aware that this isn't perfect.  I can't cut a straight line or circle to save my life and it's not as pretty as the ones I originally found, but they're close.  Better yet, I saved a TON of money.  All I needed was black and red poster board, white cardstock (which I already had) and the circle shaped hole punch.  All in all, I probably spent $15 on the entire project.  A savings of almost $100.  In my next tutorial, I'll be showing you how I attached the actual invitation with the party details.  Happy penny pinching party planning (say that five times fast!!)!

Monday, June 18, 2012

Laun-dream-y rooms

When you think of your dream home, which room do you drool over?  A kitchen with top of the line appliances and enough counter space to prep your family's dinner?  A living room with square footage large enough for you to arrange and re-arrange your jaw-dropping furniture?  A home office with built in bookshelves and a bay window?  Those are all well and good, but I dream of something a little bit different.  When I think of my dream home, I focus on one room.......the laundry.  I can't really explain it.  I don't particularly enjoy doing laundry or want to spend an excessive amount of time in the laundry room, but I can't help but drool over pictures of shelves for baskets, counter tops for folding clothes fresh out of the dryer.  I sigh over pictures of adorable laundry rooms that combine design and function.  In fact, my Dream Home Pinterest board is filled with pictures of laundry rooms and organizing solutions.  Let me just share a few of my drool-worthy photos with you:


Every family member has their own basket to put away
I want a sink in my laundry room. Bad.


Love the red and gray...and that island!!
Organized AND spacious??  When can I move in??
Is there anything I can say about this that you're not already thinking.....???
Geez.  If I get nothing else I want when (if??) Marty and I ever build, I want a spacious laundry room.  I don't think it's too much to ask, right? 
More along the lines of my current (penny pinching) budget, I've currently got my eye on a clothes line.  Eventually, when Marty and I figure out where we're going to be for a few years (it's kind of up in the air at the moment), I want an outdoor clothing line.  Saves money by not running the dryer constantly and gives your clothes and sheets a fresh air clean smell. *mmmmmm* 
Until we figure out a more permanent solution, I have my eye on these:

Indoor Retractable clothesline by Home Depot
Genius
The...$5!....clothesline.  We may have a winner.


I'll leave you guys to dream of your fabulous kitchens and living rooms.  Meanwhile, I'll have visions of clotheslines and ridiculously large laundry rooms dancing in my head.

Saturday, June 16, 2012

eBay, anyone?

Are you guys getting tired of hearing about saving money?  Good, because I'm not finished.  One of the biggest ways to get money back into your account is to take a good long look around your house and get rid of those things that you don't really need.  Idea:
On January 1, turn all of your hangers in your closet around backwards.  Every time you take something out and actually WEAR it (I'm guilty of taking it out, putting it on, changing my mind and putting it back), then flip the hanger around the right way.  In 6 months, get rid of any item that's still hanging backwards.  You can have a yard sale if you're wanting to make a little extra cash.  I think this is going to be on my mid-year resolution...I don't want to wait until next January! 

I think we all have that one item in our house that we regret buying.  That we know we spent too much on, that we didn't really need, that we wish we had the money back on it every time we see it.  My item was a Dooney & Bourke Disney sketch purse.  I saw a girl at a UK basketball game with an adorable clutch with Mickey ears and balloons all over it.  Had. To. Have. It.  Literally, the next day, I went on the Disney Store's website and located them.  You can see the entire Dooney & Bourke Disney collection here.  I wanted one so badly.  Until I saw the price.  I was not going to spend that much money on a purse.  It was absurd.  So I put the idea out of my mind....for a little while.  Until Christmas came along and my dad gave each of us a cash gift.  Enough cash to buy my little purse.  Instead of being a smart, financially saavy little girl and saving my money, I bought the purse.  I was so excited, until it came in the mail.  And it was a lot smaller than I was expecting.  I was disappointed and, more than that, I felt guilty.  Literally, every time I saw the purse sitting in the back of my closet, my stomach turned.  I had to bury it in the back of my closet because I became nauseous every time I caught sight of it.  Terrible, I know.  But I didn't want to give it away or sell it in a yard sale because I'd paid so much for it!  So it sat in the back of my closet, unloved and unused.  When I began my Penny Pinching quest, I started to go through my closet in preparation for our family yard sale.  That's when I came across the purse again.  Instead of putting it in with the yard sale junk, I discovered eBay.  I've always been really hesitant whenever eBay was involved.  Auctions make me a little bit panicky.  I don't like bidding up until the last minute on something that I really want.  So I've decided to take advantage of all eBay has to offer, not as a buyer, but as a seller.  Here she is!
You can buy this item HERE
 Cross your fingers that it sells!! Because I really hate feeling nauseous and being intimidated by a purse.
Update: in less than 24 hours, I've got a bidder! I'm guaranteed at least $95 back on this baby! What on earth was I afraid of??

Friday, June 15, 2012

1950s housewife, here I come.

It's June 14th and I'm continuing my "Penny Pinching Summer" in my quest to save and be less stressed about every aspect of my life where money and spending are concerned.  So far, I've been doing well by saving money at the grocery through coupons and store-brand shopping.  I've been keeping more green in my wallet by passing up the clothing stores for myself and Avery and only picking up things that are needed in our wardrobes.  I eat out less and cook at home more.  I bought pretty much all of the gifts for Avery's birthday using a gift card that I got to the Disney Store. 

Now, I'm looking to save money around the house.  The obvious answer led me right to my laundry room.  I know I can't be the only one who has gawked at the price of laundry detergent lately.  It's RIDICULOUS.  I buy Tide Coldwater because, obviously, I wash everything in cold water.  I also buy Dreft because Avery had eczema pretty bad as a newborn, so I didn't want anything to irritate her already delicate skin.  At ten months old, the eczema has all but disappeared and I'm ready to stop spending so much on detergent.  At Wal-Mart, the Tide Coldwater is around $12 for 100 ounces.  The Tide website says that you can get 52 loads out of a 100 oz.  So I'll base my numbers around that estimate, although I probably get less loads out of a bottle because I'm super guilty of not measuring out my detergent.  Pour some in the cap, dump in the wash, close the lid.  Anyway, back to the detergent.  If you are a good little laundry-doer and get the 52 loads out of a container, you're spending 23 cents a load.  I hear you now, Devan it's only 23 cents.  What on earth can you buy with 23 cents??  Just wait.  If you also count the Dreft, which is about $16, at 52 loads, I'm spending 30 whopping cents a load on baby clothes.  Yeah, that's gotta stop.
Once I decided that I wanted to go all pioneer woman and make my own detergent, I started looking around on Pinterest (of course) for the perfect detergent "recipe."  I was surprised by the variety of homemade detergents.  Some people put scented oil in theirs to give their laundry a fresh, clean scent.  Others put Oxi Clean in to make sure their whites sparkled.  Still others added baking soda to give their laundry that extra "oomph."  Despite all the variations, three ingredients remained consistent in all the recipes--Borax, Arm & Hammer Super Washing Soda and bar soap.  Most used a fancy type of washing soap like Fels-Naptha or Zote, but I decided that I would stick with good old, time trusted Ivory soap.  I decided to stick with the basic 3 ingredients for now and leave the recipe open to change if I decided it needed a little something more.
Count 'em...just THREE ingredients
After the ingredients were purchased, it was time to assemble.  I bought a small plastic container at Wal-Mart that I knew would fit in my laundry room and would hold a large amount of detergent if I decided to make it in bulk.  Making this detergent couldn't be easier.  Three steps.....ready?  Pour the entire boxes of Borax and Super Washing Soda into your container. 

After the two powders are poured, take a cheese grater and grate 3 bars of soap into the mix.  If you have a food processer, you can use that....I'm not fancy and had to use a basic hand grater.  The result will look like a bunch of grated Mozzarella cheese.  It's not.  Don't eat it. :)  Another plus to making this detergent?  Your arm gets a good workout while grating. 
Don't be fooled...it's soap.
Alright.  Soap is grated, powders are poured.  Now, stick your hand in and mix it all together.  This was the hardest part for me because I'm a texture freak and this was weird.  I mixed quickly and ran to the sink to wash off.  And I'm D-O-N-E, done.  
Detergent!
Now for the savings.  Prepare to be stunned.  Earlier I mentioned that I was spending 23 cents for every load of mine and Marty's clothing and 30 cents on Avery's.  On my three ingredients, I spent $7.86.  Most of the blogs I read of ladies making their own detergent call for either one or two heaping tablespoons of detergent in your washer.  Here comes a little math...stay with me....the Borax comes in a 76 oz box, the Washing Soda is 55 oz and the three bars of soap were a total of 9.5 oz=140.5 ounces of detergent.  The conversion from ounces to tablespoons is 1 oz=2 tablespoons, so I have approximately 281 tablespoons of detergent.  If I put just ONE tablespoon per load of laundry, I would be able to do 281 loads.  Ready?  $7.88/281= 3 CENTS A LOAD.  Even if I use two tablespoons per load, I'm spending about 6 cents.  Are. You. Kidding. Me??  Basically, every time I walk to my washing machine and do a load of laundry, I'm saving myself 50 cents.  On 281 loads of laundry, I'm keeping $140.50 for myself to spend on something else.  Take a moment to soak that in.  Can we say "No Brainer??" 
Of course I had to make the container pretty.  I'm a self-diagnosed over decorator.
Note:  Most articles I read mentioned that you might have some soapy build-up from this type of detergent.  It's an easy fix....dump a cup of vinegar in your washing machine and run an empty load to keep your drum clean and soap-free.  Some places also mentioned using 1/4 cup of white vinegar in the dryer as a fabric softner to remove soapy residue from clothing.  I'll be interested to see how my detergent smells and how well it cleans my clothing.  I'll keep you guys updated on that.  But for now, 20 cents of savings is worth trying my homemade detergent!  Next, I'm working on finding ways to save on fabric softner.  Stay tuned for more Penny Pinching tips around the home!

Sources:  Sugar Pie Farmhouse  Yellow Brick Home  How Does She?

Tuesday, June 5, 2012

Menu! Printables! Supper Clubbing!

As promised, this week's "Super Messy Supper Club" menu:

Monday-- Rotel Chicken Skillet
Tuesday-- Ranch Chicken  (Combine 3/4 cup crushed cornflakes. 3/4 cup parmesan cheese. 1 packet of hidden valley ranch dressing mix. Dip 8 chicken halves in melted butter and then roll in cornflake mix. Place in greased 9x13 pan. Bake @ 350 for 45 min)
Wednesday-- Forgotten Chicken                                       
Thursday-- Baked Fajitas

Friday-Sunday, I'll be in Gatlinburg for my cousin's bachelorette party, so Marty and Avery are on their own. :)

And since we know that you should menu plan before you go shopping for all your dinner ingredients, I've made up your very own "Super Messy Supper Club" menu and grocery list planner for you to save to your computer and print off any time you make your weekly menu and shop accordingly.  Happy menu planning. :)