Avery is
turning one soon and I am in full-blown party planning mode. Thanks to Pinterest and its abundance of Minnie/Mickey themed party ideas, I have a million things I want to do. Obviously, people have to KNOW about the party, so I'm tackling the super-adorable-but-crazy-time-consuming-and-overambitious invitations. And if you're crazy like me and want to keep some money in your pocket by making your own invites, then this tutorial is for you.
When I first started thinking about themes and looking at invitations, I came across these:
I died. Can words describe how cute these are?? I immediately clicked the link, searched through her Etsy shop.....wait.....does that say $27.50 for a set of 10 invitations?? Considering my family is ginormous and we're probably going to have close to 40 invitations to send out, that means I would be paying a whopping $110 for 1st birthday invitations! Not happening my friend. So I tried looking at other (and less) expensive options for my sweet girl's party. I found nothing that I liked as much as these sweet invitations. That's when I temporarily lost my mind and decided to make these invitations by hand. For you penny pinching birthday planners like me, here are the steps I used to make my very own Minnie Mouse invitations. {Warning....this tutorial is about to go picture and detailed description crazy. I like step by step pictures because I'm more of a visual person. Oh, you too? *friends*} Ready? Let's go.

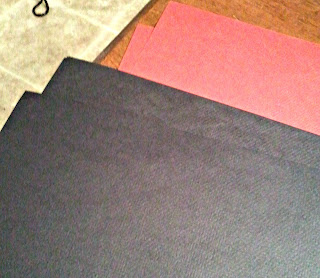
{step1} I started by purchasing black and red poster board for Minnie's head and dress. If you're sending out a smaller quantity of invitations, you can also purchase red and black cardstock. I knew that I would need to be making these in bulk, so I went with the poster boards. I did splurge a little here and buy the posters at Michael's instead of from Wal-Mart or Target. Reason being is the color is a little richer and not so washed-out looking.
{step2} I knew that these invites would be a little funky shaped, so I went to my nearest office supply store and bought the only square envelopes I could find--CD envelopes with the window (which needs to be covered up before mailing).
{step3} Next, I laid one of the envelopes down on the black paper and traced out the shape so I knew exactly how much room I had to work with and how big my Minnie heads could be.
{step4} After having the envelope size, I found a cup that was the perfect circle shape for Minnie's head. Laying it on the black poster board, I traced around the cup in pencil.
{step5} When I found the perfect circle shape for the head, I went on the hunt for a circular item for the ears that were in proportion to the head. I used one of Avery's bottle tops, but you can use any item laying around the house that is circular shaped and is about the right size. Trace around it with pencil.
{step6} Once you have your Minnie head drawn, cut it out.
{step 7} Take the same cup you used for Minnie's head and draw a circle onto the red poster board. Cut out.
{step7} Line the red circle up with Minnie's head that you cut out of the black poster board.
{step8} By eyeballing the red circle or measuring it out, cut it in half.
{step9} Glue a line in a half circle shape along the bottom of Minnie's head (kind of making a smiley face).
{step 10} Place one half of the red circle on the bottom half of Minnie's head where you just placed the glue. This will create a pocket for you to put your written invitation inside!
{step11} Every good Minnie fan knows that Minnie wears a polka dotted dress. To create the dots, I took a circle-shaped punch (purchased at Michael's) and punched out multiple circles out of white cardstock paper. I randomly placed the circles along the red poster board and glued them on with tacky glue.
{step12} Here's where you can get a little creative. Minnie Mouse would not be complete without her signature bow. I had originally purchased thin ribbon that was red with white polka dots to match Minnie's dress. When I made the bow and held it up to the invitation, I wasn't happy with the overall look. For a bigger punch, I decided to make Minnie's bow out of red poster board just like the dress. I free-handed a bow shape onto the poster and cut it out.
{step13} After cutting the bow out, I took a fine black Sharpie marker and added little details. After that, I took a regular hand hole puncher and cut out smaller polka dots from the white cardstock and glued those onto the bow with a glue stick. After that was completed, I then glued the bow onto Minnie's head. Ready for the final product? *drumroll*
I am completely aware that this isn't perfect. I can't cut a straight line or circle to save my life and it's not as pretty as the ones I originally found, but they're close. Better yet, I saved a TON of money. All I needed was black and red poster board, white cardstock (which I already had) and the circle shaped hole punch. All in all, I probably spent $15 on the entire project. A savings of almost $100. In my next tutorial, I'll be showing you how I attached the actual invitation with the party details. Happy penny pinching party planning (say that five times fast!!)!


